

Did you know that you can customize the order of the panels within the Develop Module in Lightroom’s interface?! And it is so quick and easy to do!
You can even hide panels you never use, to keep your working space clean and organized.
I personally, customize the panels, in the order in which I use them the most. It makes my editing in Lightroom seamless! So let me show you how to do it so you can customize the panels in your Lightroom interface.
To customize the Develop Panel menu, do the following:
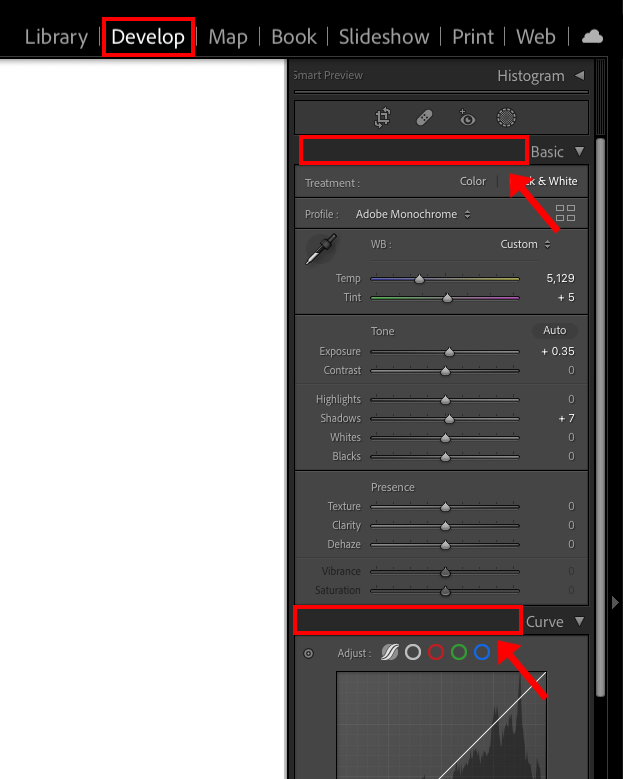
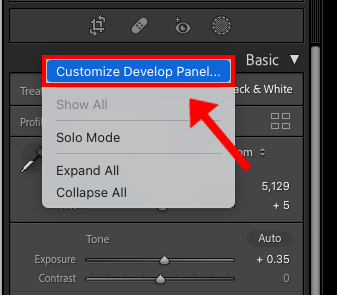
ONE: Right-click on the header of any panel in the Develop Module.
TWO: Select “Customize Develop Panel” from the drop-down menu.
THREE: In the Dialogue box that opens, drag-and-drop the panel names in any order you desire.
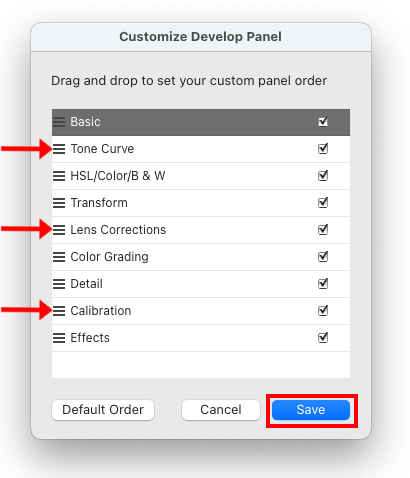
FOUR: Click Save and restart Lightroom to so your new customized order! It’s that easy!
One Last Tip
To hide any panel in the Develop Module, uncheck that panels name, in the drop-down menu. To show a panel that has been hidden, check the box next to its name. And to restore Lightroom’s Default Order, click Default Order in the drop-down menu.
See it in Action
If you found this helpful, I have many tutorials on my You Tube Channel where you will find weekly Lightroom editing tips and shortcuts. Be sure and SUBSCRIBE so you’ll never miss them. And please share this with a friend who also loves to edit!
If you have editing questions, never hesitate to reach out. I am always here to help. DM me on Instagram @alisamccormick and let’s chat! I am an open book and love to help others grow on their editing journeys.
Until next time, Happy Editing!


leave a comment