

What if I told you there is a way to alter ONE color in an image, in Lightroom, without affecting the entire image. There is! This hack is found in the HSL Panel within the Develop Mode.
BUT FIRST
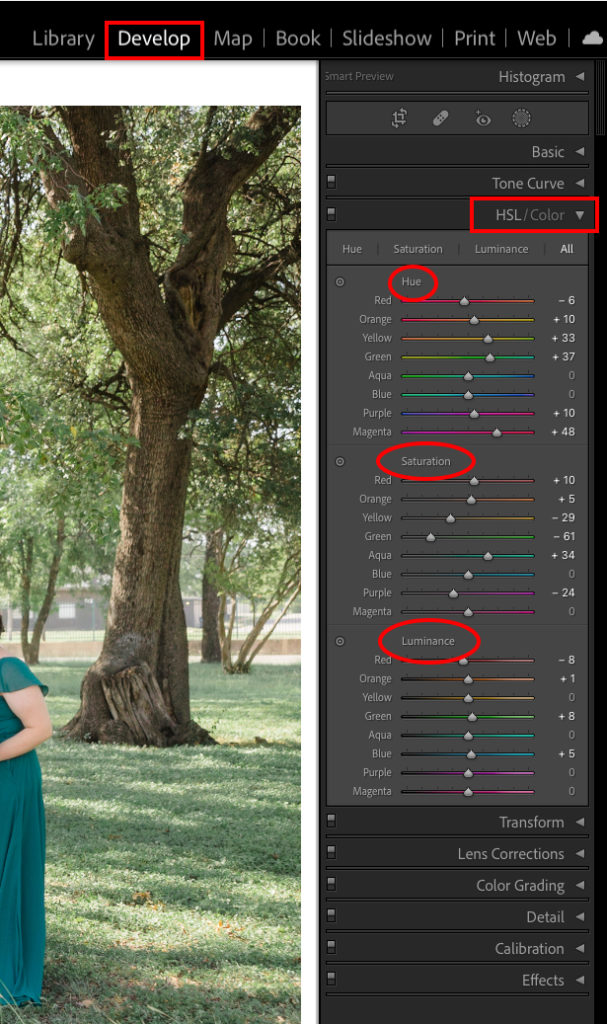
What is the HSL Panel. HSL stands for H-Hue, S-Saturation, and L-Luminance. The HSL Panel can be found in the Develop Mode of Lightroom’s interface. And you can alter the hue, saturation and/or luminance of any color by itself, without correcting other colors. It is brilliant!
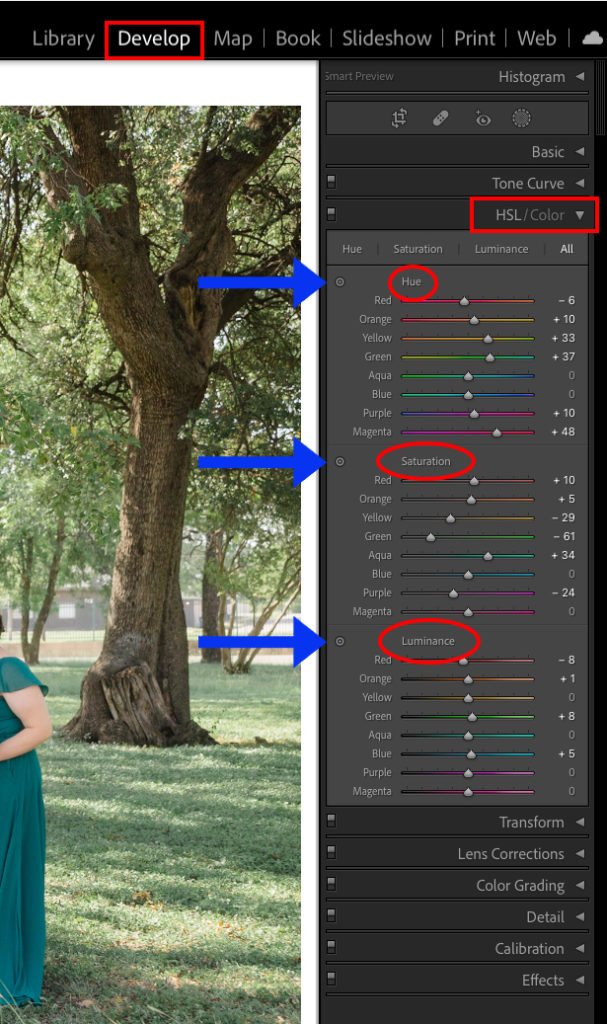
There is a handle, to the left of the HSL Panel, that looks almost like a target. You will actually find three handles in the HSL Panel. There is a handle for each section; Hue, Saturation, and Luminance. The blue arrows are pointing to the handles.
If you click any one of the three handles, and hover over a color in the image, you can change that color’s Hue, Saturation, or Luminance, without affecting the rest of the image.
Watch the video tutorial to see it in action. You are going to LOVE the control it gives you!
If after watching the video you have any questions, drop them below. I am here to help and to be a resource for you.
If you found this helpful, I have many tutorials on my You Tube Channel where you will find weekly Lightroom editing tips and shortcuts. Be sure and SUBSCRIBE so you’ll never miss them. And please share this with a friend who also loves to edit!
If you have editing questions, never hesitate to reach out. I am always here to help. DM me on Instagram @alisamccormick and let’s chat! I am an open book and love to help others grow on their editing journeys.
Until next time, Happy Editing!


leave a comment