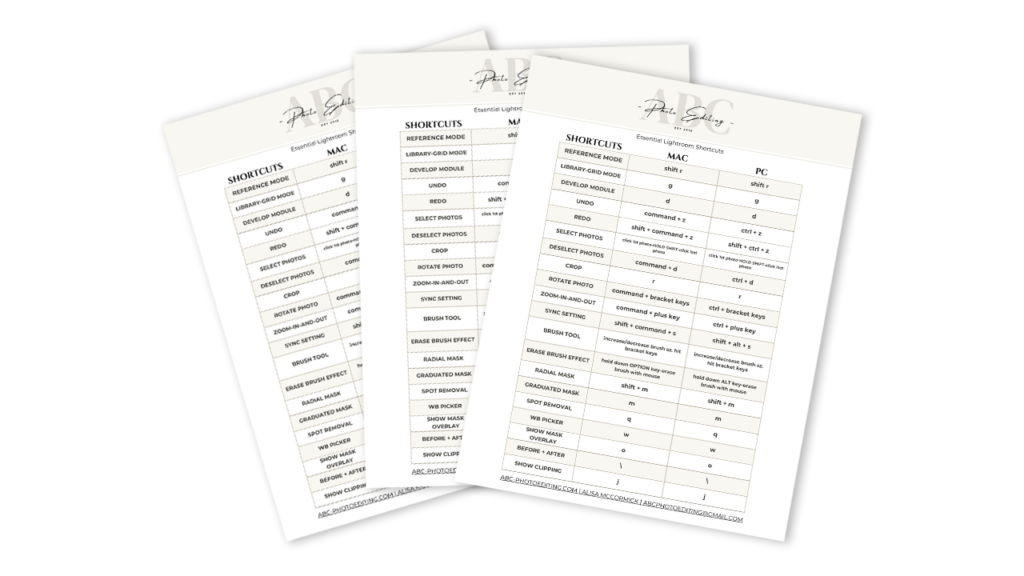
If you edit photos in Lightroom, the BEST thing you can do to significantly increase your editing time, is learn Lightroom Shortcuts!
I have shared some of these before, but 8 years into this private editing gig, I still use these shortcuts everyday, so it bears repeating! Below are my fave shortcuts for this year!
MEMORIZE KEYBORAD SHORTCUTS
Learn and use keyboard shortcuts to speed up your editing process. For example, pressing “D” for the Develop module, “G” for the Library module, and “E” for the Loupe view can help you navigate quickly. These are just a few of the ones I use daily.
And to make it easy for you to get started on memorizing my most used shortcuts, I created a FREE PDF of the Lightroom shortcuts I use the most. It’s free, with zero obligation. I don’t even ask for your email.
So download it today, start using these shortcuts, memorize them, and watch your editing time speed up exponentially!

DOWNLOAD THE LIGHTROOM SHORTCUTS
Also, there are a few more things I do as a private editor, that are worth sharing as well!!!
CREATE YOUR OWN PRESETS
I use presets, all day everyday, as a starting point, on most of the images I edit. Starting with a preset, when editing, helps to achieve consistent edits across multiple photos with a single click.
Even though presets will RARELY give you a one-click-and-done result, they are an awesome starting point.
The only thing better than using presets, is actually creating your very own presets. A preset that works perfectly with the way YOU typically capture phots. Creating your own preset, versus buying someone else’s, is a night-and-day difference. And it is SO easy to do. I show you how in THIS BLOG POST
CREATE YOUR OWN LIGHTROOM PRESET
ALWAYS USE THE SYNC/AUTO SYNC FEATURE
Using the sync features, when batch processing images, is THE ONLY way to go! This can save you a countless hours, especially if you are editing a high volume of photos.
This tutorial, created by The SLR Lounge is so well done. They do an excellent job of explaining the difference between SYNC and AUTO SYNC. They also talk about the advantages of each, and when it is better to use one or the other. It’s definitely worth taking 5 minutes to watch!
USE THE VIRTUAL COPIES FEATURE
When you create a virtual copy of an image, it allows you to experiment with different edits without affecting the original image. Virtual copies are also an excellent way to give your clients a color version and a B&W version of the same photo.
ALWAYS ORGANIZE YOUR LIGHTROOM CATALOGS
Use keywords, star ratings, flags, and color labels to organize and easily find your photos. Also, Creating collections and collection sets can help you group related images together.
It takes a few minute to organize a Lightroom catalog, but I promise it is worth the time!
LEARN FROM FREE TUTORIALS
Explore online tutorials and resources to learn new editing techniques and stay updated on the latest features and capabilities of Lightroom.
And I’ll add a shameless plug here. SUBSCRIBE to my YOUTUBE channel where I post free video tutorials about Lightroom. I love sharing the tips + tricks I have learned over the years!
I hope you found this helpful, And again, I have many tutorials on my You Tube Channel where you will find weekly Lightroom editing tips and shortcuts. Be sure and SUBSCRIBE so you’ll never miss them. And please share this with a friend who also loves to edit!
If you have editing questions, never hesitate to reach out. I am always here to help. DM me on Instagram @alisamccormick and let’s chat! I am an open book and love to help others grow on their editing journeys.
Until next time, Happy Editing!

leave a comment