One of the most useful and commonly used shortcuts in Lightroom is using the feature “LIGHTS OUT.” When you use “Lights Out” within Lightroom’s interface it helps you to assess your edits and focus on the details of the photograph without any distractions.
There are two quick and easy ways to see any photo in Lightroom with the “lights out.”
THE “F” KEY
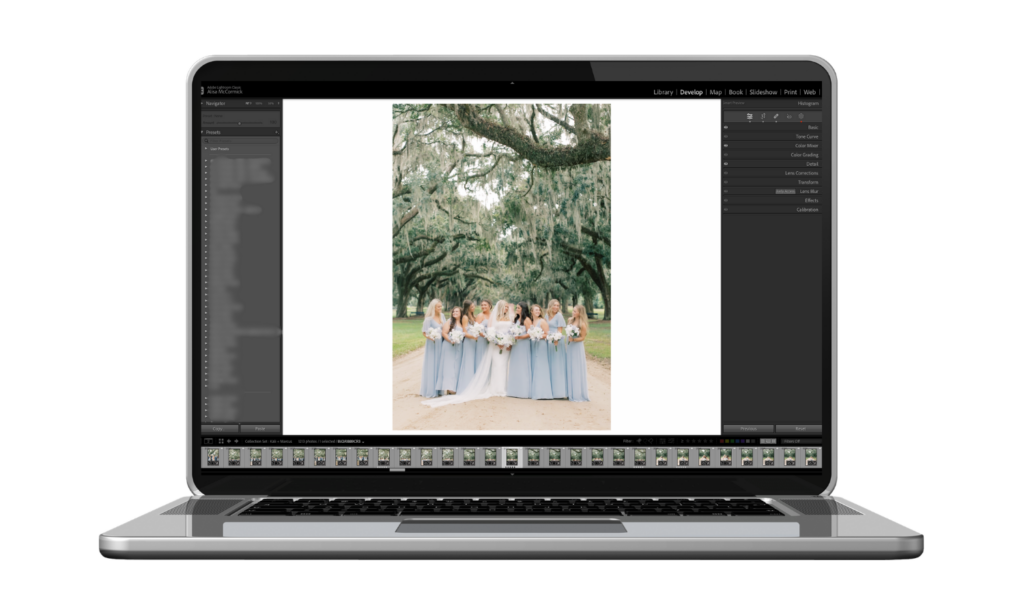
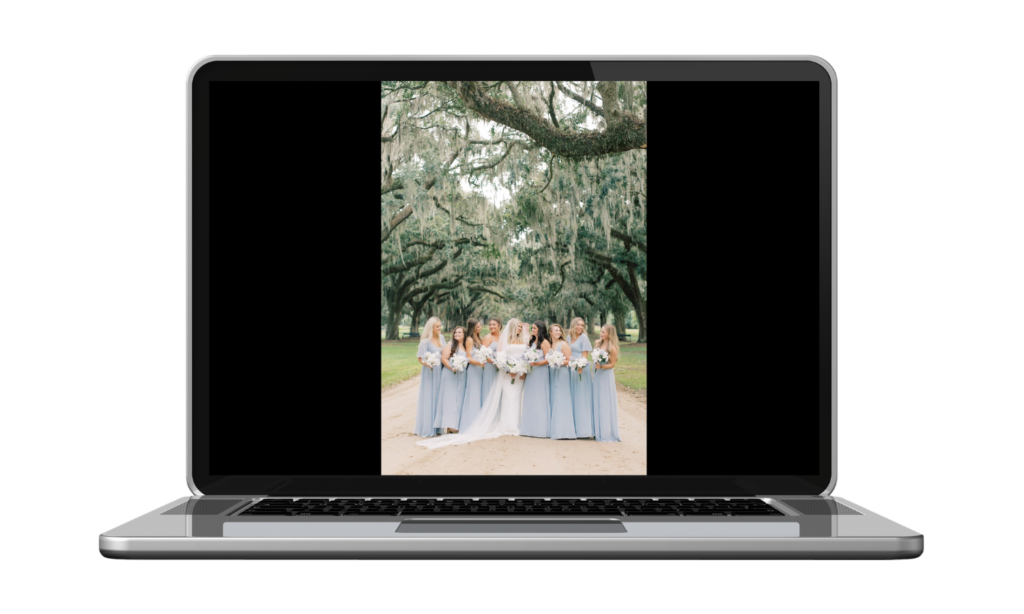
At anytime while editing, just press the “F” key and Lightroom will toggle the “lights” on-and-off. The first time your press “F” it completely blacks out the interface, allowing you to view the image in isolation. Press the “F” key a second time, and you’re back where you started.
Go from this…

To this…

THE “L” KEY
You can also press the “L” key, to turn the “lights out.” This shortcut toggles between a couple of options. The first time you press it, Lightroom darkens everything but your selected image by about 90%. Press “L” again, and it goes black, leaving nothing but your image to see.
Press “L” a third time, and the “lights” come back on.
TRY IT YOU’LL LIKE IT
Give them both a try and see which one is your favorite. But this I can promise. Once you’ve learned to do this, you’ll find yourself using it all of the time so you can really focus on an image without any of the distractions!
If you found this helpful, I have many tutorials on my You Tube Channel where you will find weekly Lightroom editing tips and shortcuts. Be sure and SUBSCRIBE so you’ll never miss them. And please share this with a friend who also loves to edit!
If you have editing questions, never hesitate to reach out. I am always here to help. DM me on Instagram @alisamccormick and let’s chat! I am an open book and love to help others grow on their editing journeys.
Until next time, Happy Editing!

leave a comment